Some of you may be wondering what this fusible grid is that I keep referring to (and have listed in the supply list and patterns), or asking if it’s necessary to use when you could just sew the small squares together. The answer is no, it is not necessary, but the results do turn out better in the end. The reason is because it provides a solid, stable base when sewing the small squares together in rows, and sewing the squares together separately (standard piecing) the bias from the fabric comes into play, even though they are cut as a square – they are very small!
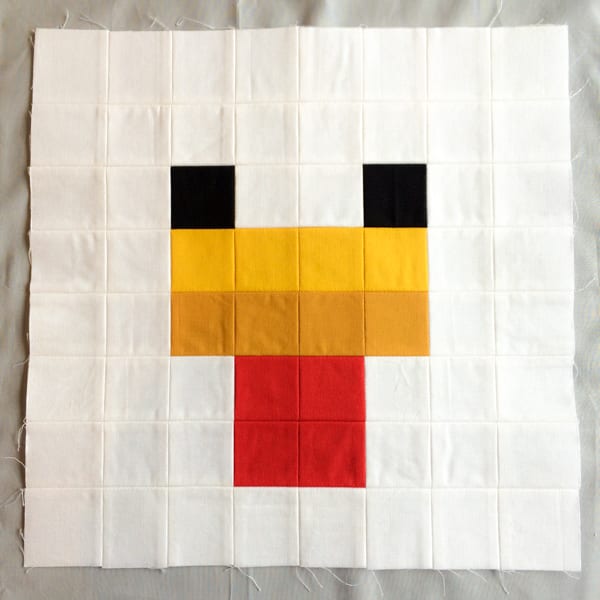
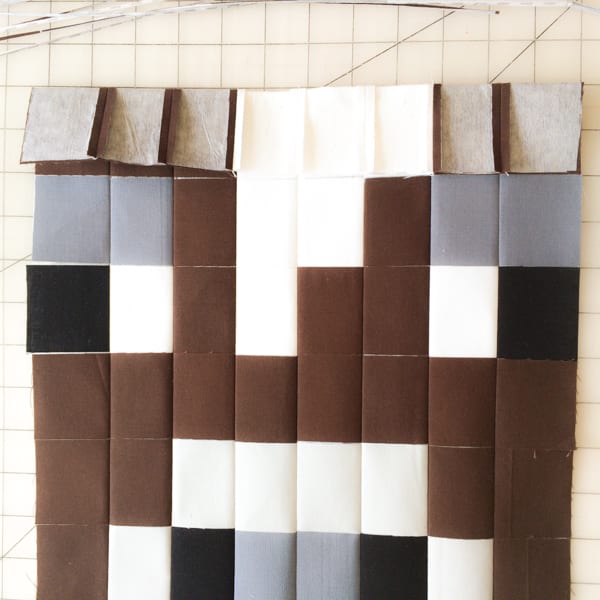
Take a look at these 2 images: The top image is my Minecraft Chicken Mug Rug top, sewn together without using fusible grid (and slightly smaller squares). The second is the quilt block using fusible grid. The white background helps the outer squares blend together, but you can see in the beak and tongue areas they don’t always line up exactly in the mug rug; using the fusible grid below it turned out much better.
So here is my method of using fusible grid to make the Minecraft Quilt Blocks. What I found at my local quilt shop was QuiltFuse 2″ fusible grid HTC-3240-White, 48″ wide:
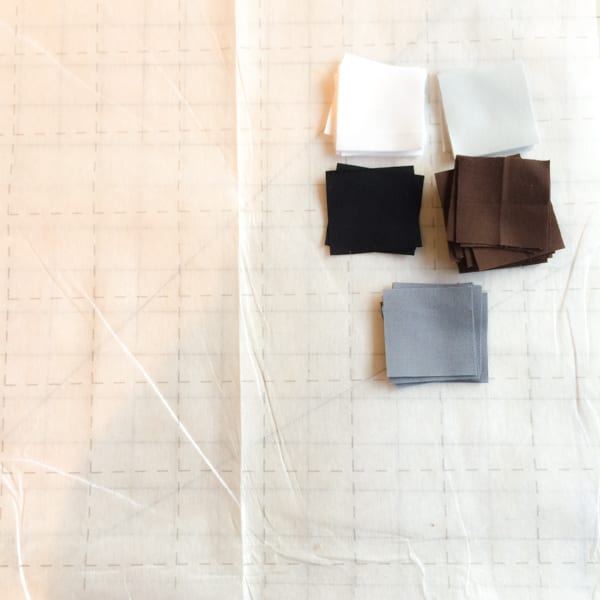
Step 1:
Cut out the squares for the block, and the piece of fusible grid you are going to use – just cut on the grid lines and make sure you are only cutting through one layer. (There wasn’t much left on the bolt so they sent it home with me, it was folded double on the bolt).
Step 2:
Assemble the block squares on the grid, edge to edge. It should be close to the grid lines on the fusible fabric, but it may not be exact. Take your time to cut your 2″ squares exactly and you should be okay.
Step 3:
Iron all the squares in place on the fusible grid – glue side up, grid side down – hot iron, no steam. The glue isn’t that strong and the pieces may fall off before you are done sewing every row. That happened to me at least once every block, just make sure to iron that piece back into place and be careful moving the block back and forth to your sewing machine, ironing board and cutting table.
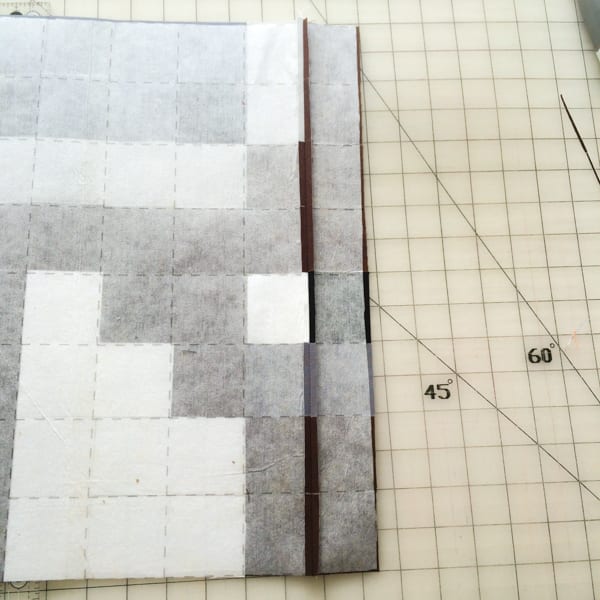
Step 4: Fold one row or column over, i.e. column 8 folded over onto column 7 and iron flat, like this:
I have found that the grid is a little slippery when sewing, so it is helpful to have a quilting glove on the left hand while I sew the 1/4″ seam to help guide the fabric through uniform and straight.
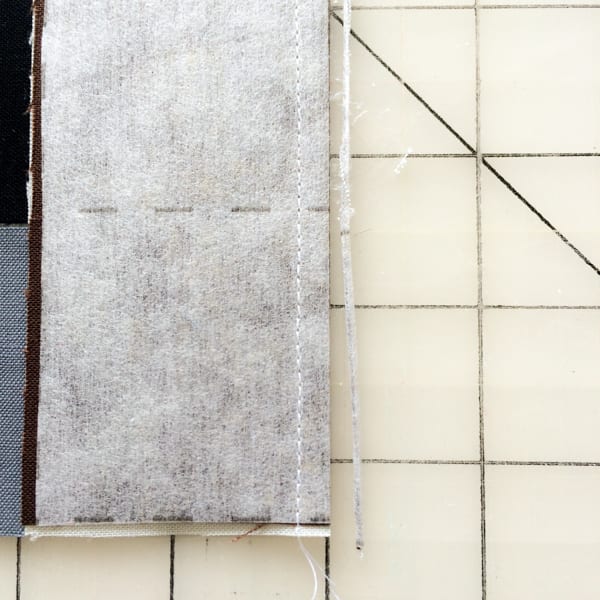
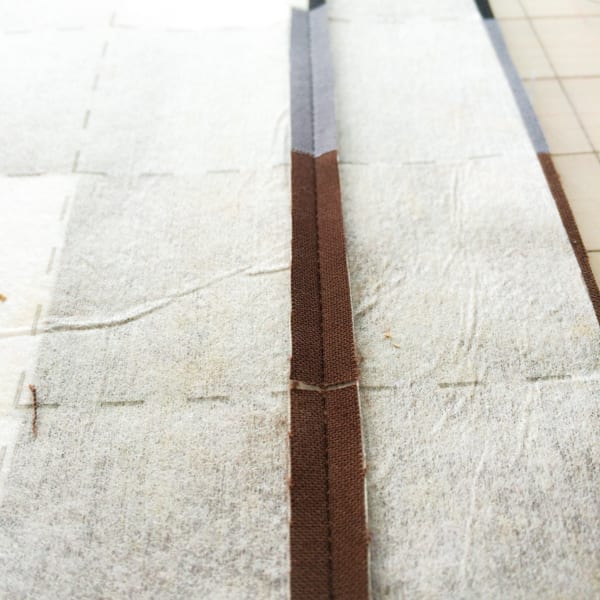
Step 5: Sew 1/4″ seam to connect these 2 columns:
Step 6:
Cut off just the edge of the fold, just enough to allow you to iron the seam open:
Step 7:
Fold the next column over and iron flat, column 7 folded over column 6:
Step 8:
Sew another 1/4″ seam and cut off just the fold. Iron open.
Step 9:
Repeat this process for the remaining columns.
Step 10:
Rotate the block and fold the top row down over the second row:
Step 11:
Iron flat and sew 1/4″ to combine these two rows:
Step 12: Cut off just the fold and iron seam open:
Step 13:
Repeat this process until all rows are complete:
Step 14:
Your block is done!
As you can see with this finished Minecraft Cow quilt block, the squares line up nicely, even if sewing it together using the fusible grid wasn’t the fastest method, or even the easiest. But it’s done, it’s solid, and it looks great!
I would love to hear if the fusible grid worked as well for you as it did for me, and share your blocks with me – find me on Instagram @myrainydaydesigns and use the hashtag #MinecraftQAL.
Welcome to the Minecraft Title Block! To create this block I STRONGLY suggest you use fusible grid, even if you haven’t used it on the other blocks! It will help in keeping the small squares more stable.
To create the Minecraft Title Block you will need the following Kona solids: Black White Fusible Grid
I would love to see your Title Block! Please find me on Instagram @myrainydaydesigns and share it using the hashtag #MinecraftQAL.
I had a request from Kelly who is using 9 of the Minecraft designs to make a quilt for her daughter’s class fundraiser; the nine blocks include the request of an Ocelot or Cheetah (the cheetah is the school mascot). I have a feeling there is going to be one happy kid at that school after the fundraiser!
I did a search for Minecraft Ocelot and Cheetah and didn’t find much for Cheetah, but found several images for Ocelot. I came up with an initial concept that I shared with both Kelly, and my son Riley. Kelly liked what I came up with and wanted to add more spots for the cheetah for school. Riley told me to remove 2 of the spots and make it an Ocelot. So with this information, you can either run with it as is and have an option for an Ocelot, or add some more spots and have a Cheetah. Either way I think he’s pretty cute, and this little guy will be turning into a pillow for my son’s bed.
To create the Ocelot block you will need the following Kona solids: Banana Yarrow Raffia Jungle Coffee Espresso White
I would love to see the progress on your blocks – find me on Instagram @myrainydaydesigns and use the hashtag #MinecraftQAL.
This is the last main block of the Minecraft Quilt! Are you ready to create the Zombie block? I think he’s kind of cute, don’t you?
To create the Zombie block you will need the following Kona solids: Laurel Jungle Malibu Black
Isn’t it exciting to have the last block? I would love to see your progress – find me on Instagram @myrainydaydesigns and use the hashtag #MinecraftQAL.
There’s something about the Wolf – he looks dangerous yet adorable at the same time. Like other blocks, he is primarily one color with a few other colors thrown in to give him character.
To make the Wolf block you will need the following Kona solids: Shadow Earth Raffia Black Coffee White
Be sure to save all your squares from previous blocks and check for any leftover squares for the new blocks!
I would love to see the progress of your blocks – find me on Instagram @myrainydaydesigns and use the hashtag #MinecraftQAL.
Today you get to make the TNT block! While more challenging than the other 15 main blocks, this will be good practice for the main Title Block coming up. In the TNT block you will be using 2 different sizes of squares. I urge you to try the fusible grid on this block if you haven’t been using it yet. As you can see the Cardinal squares are the standard size, and half the white blocks are standard sizes, but the center section of Black and White squares are smaller – the same size they will be in the Title Block.
Take your time and cut accurately, go slowly, and it will work out beautifully!
To make the TNT Block you will need the following Kona solids: Cardinal White Black
I would love to see the progress you are making on your blocks – find me on Instagram @myrainydaydesigns and use the hashtag #MinecraftQAL.