I didn’t post the second half of the blocks or the completed top! I had finished the 8 required blocks, but 9 was in my final plan. Other things kept coming up so I was rushing until almost the last minute to try to finish the final block and put them all together, so of course there were many issues. I probably would have changed a few things, but I don’t think I want to rip out and do it again.
My center block was not in the Mini Series, but I think it ties in perfectly. My biggest frustration was that even though all of these blocks were to work together for the series, the finished size of each block is different. So even though I created the full size of each block, they all have a different color count, and different finished size. Frustrating, but able to go back and delete the outer edge and sew on a new, fatter edge. It’s not perfect, but it is done. I think it was raining outside that day so the indoor photo isn’t great. Will try to get a better one when it is DONE done.
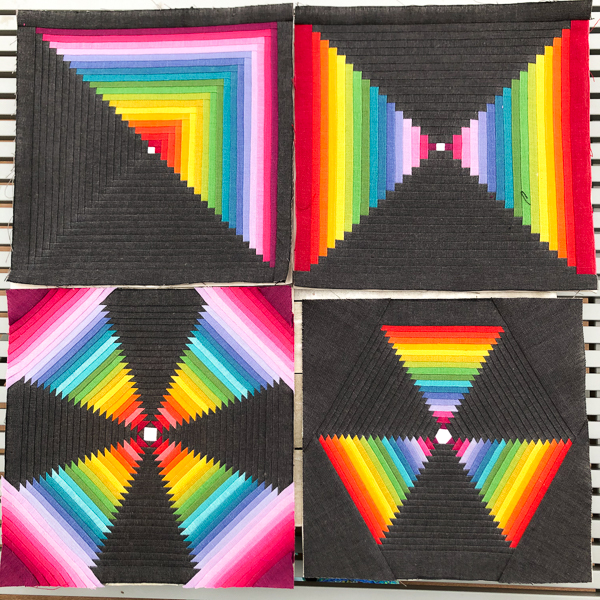
Have you seen the Alison Glass / Guicy Guice Mini Series Sew Along? We are halfway done this week and I wanted to share. I did find one problem last night that you will see below, but I should be able to fix it.
I am using the Alison Glass Kaleidoscope fabric collection again, the same one I used for the Trinket Quilt. What I have found so far is that when I planned on a set of colors, each block has a different number of colors, so each block is a little different, and I start from scratch with my colors each time – but Kaleidoscope has 40 colors so it works. You can make the blocks to be any size – I chose to make them full size.
The first 4 Blocks are the Log Cabin, Courthouse Steps, Pineapple, and Hexagon Steps.
Photos below – and find out more about this Sew Along here.
As you can see – the Hexagon Step Block is smaller than the other blocks – but I think I can fix it if I rip out the last 6 steps and redo them, and just cut it a little larger. I’m just not sure why the pattern was made that way.
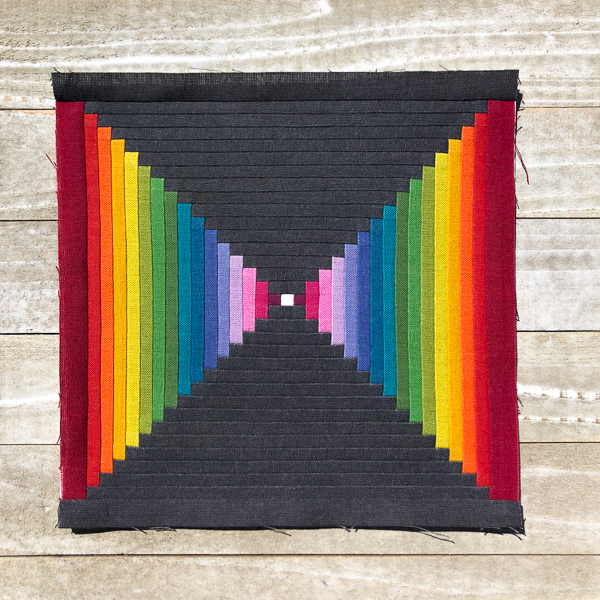
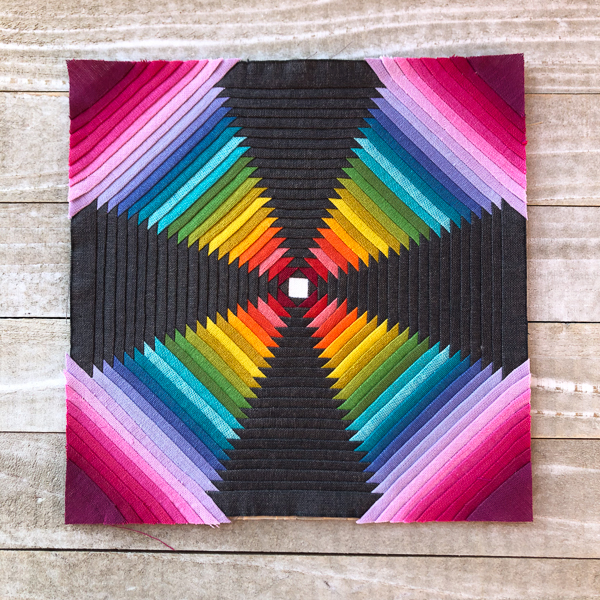
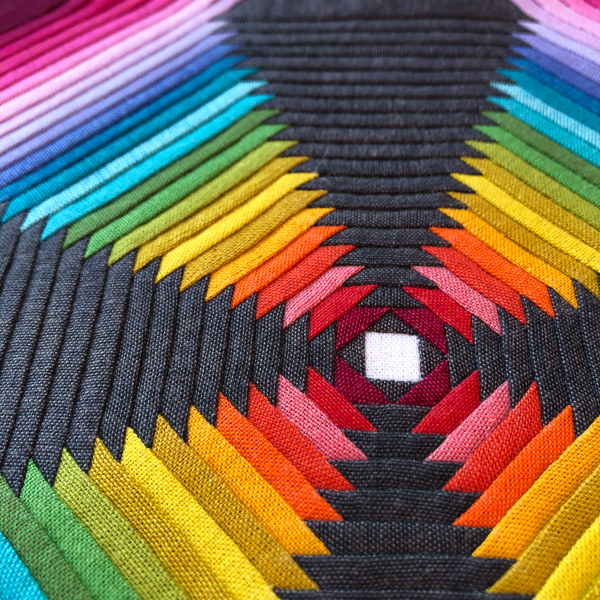
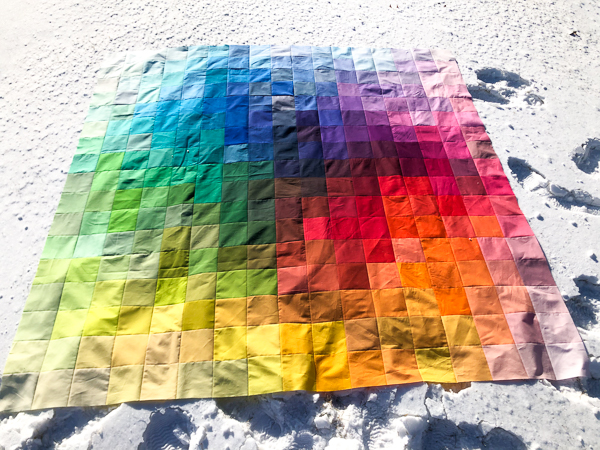
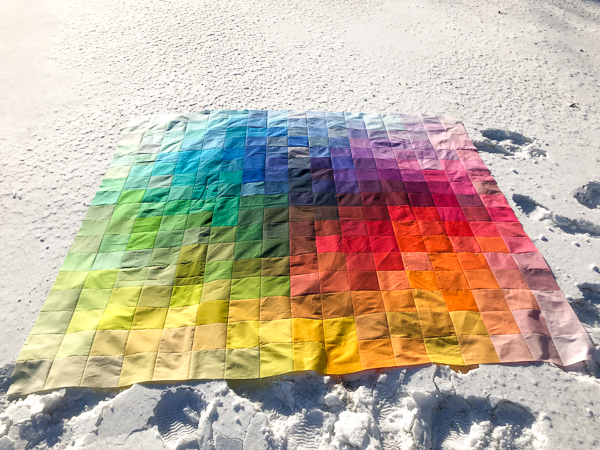
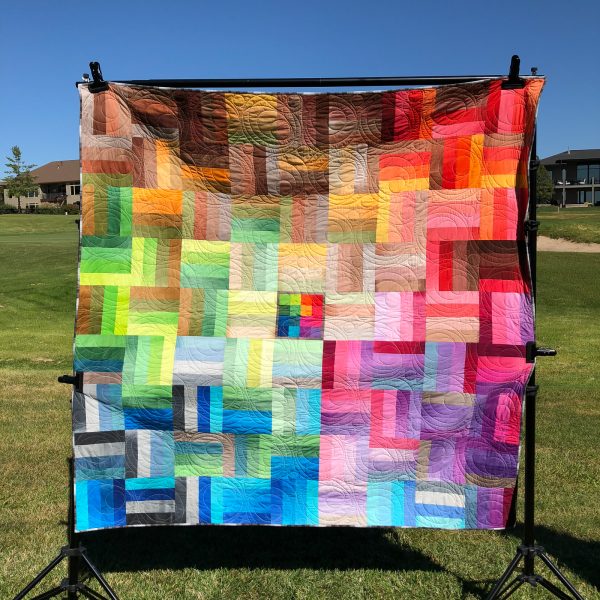
The Holidays were so busy and I was focused on so many other projects that my Kona Color Burst quilt top was in “half done” status for awhile. This weekend I powered through and did 2 blocks on Saturday and the final 6 blocks Sunday morning and sewed them all together. Finally done with the quilt top!
Then I ventured outside… It was “Feels like -11º” and very windy. I tried to get a shot of the quilt top on a serene white background – but instead you see my bootprints. You should have heard me yelling at the wind. These were the best shots I could get for now. I can’t wait until it is finished and I can try to get some better shots – and it might be warmer.
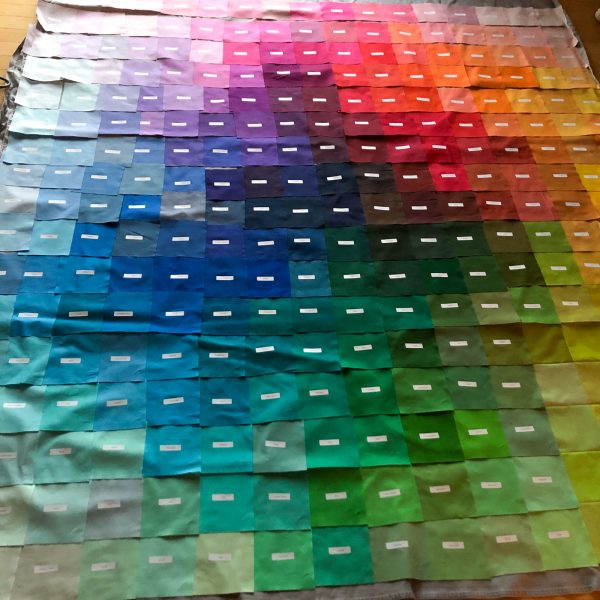
I cleared the board and started from scratch, with one colorful square at a time. I have been wanting to make this pattern for awhile, and with 365 colors to play with, it seemed like the right time. I took all the colors and a few neutrals, and built from the center out.
To make this easy, order one of each of the following charm packs, precut by Robert Kaufman Fabrics: Kona Cotton Pastel Colorstory CHS-692-85 Kona Cotton Bright Colorstory CHS-693-85 Kona Cotton Dark Colorstory CHS-694-85 Kona Cotton Neutral Colorstory CHS-695-85 Kona Cotton New Colors 2019 CHS-851-42
This pattern uses the majority of the colors, but just one of each. You will also receive a Bonus PDF on how I create my blocks, and my method for keeping them organized and sewing them together with the least amount of seams. And a new PDF with the charm pack color order and labels to print.
I made this with 5″ squares, for a finished size of 76 1/2″ x 76 1/2″.
I know I posted a couple weeks ago that the Kona Color Card Patterns were updated – but I updated them again! Two reasons: One, because I found Robert Kaufman’s charm packs to total all 365 colors and easily put it all together – I even have a PDF now with how they are sorted through the charm packs, top down. All you need to do is print the labels, label the fabrics and start sewing. Plus this makes the finished size even bigger and snugglier – I know that is what I am after, when we all try to share the quilt on the sofa for movie night!
And two: I moved one square of the Color Burst layout as I was sewing it together. And when one square moves, they all move. But this is it – no more moves, and it is almost halfway sewn together. I will have a Color Burst Quilt Top completed photo for you soon.
For now, below is my final floor layout and a photo of the bottom row sewn together. I am excited about it all coming together and what that will look like – definitely different than the computer version – but I had to start with something!
Find the Kona Color Card Pattern Set (x4) and the Color Burst Pattern here on Etsy. If you want to make one or more of these with the precut Robert Kaufman Kona charm packs, order one of each (per quilt): CHS-692-85, CHS-693-85, CHS-694-85, CHS-695-85, CHS-851-42. And 5 sheets of Avery 8167 labels. This Color Burst shown below will be just over 6′ square when finished.
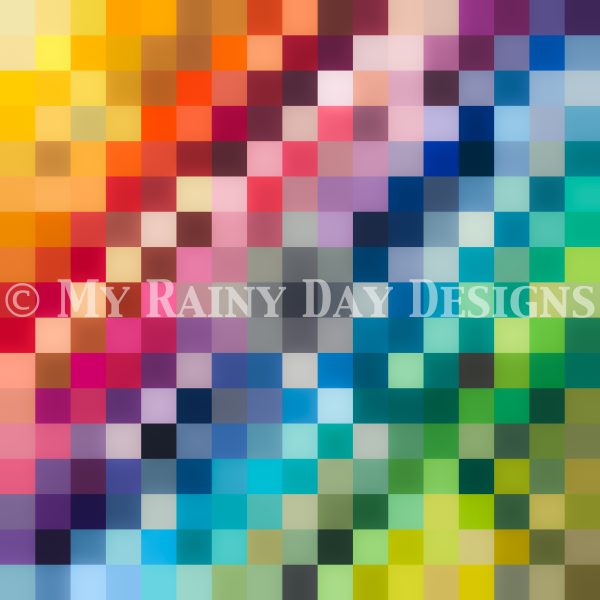
As you may have heard, Robert Kaufman just released 25 new Kona Colors – yay! So I needed to update the Color Card Quilt patterns. I rewrote and reconfigured Color Card Versions 1 and 2, Color Order and Color Slide. I kept Version 3 as is, Color Shift because I like that version. And I created a new Version 4 Color Refraction – along the same lines as Version 3, but uses almost all of the Kona Colors. Plus I added a new embroidered label for Versions 1 and 2.
And then I created a blank slate and started again from scratch, square by square, to create a completely new version, the Color Burst. I have been wanting to create a version like this for a while, and with 365 colors now, I thought this was the perfect time. This version uses all of the Kona Colors and a few neutrals, and builds from the center out, darkness to light. I will be making this version with 5″ cuts for a finished size of just over 6′ square. I am excited about this one! I saw a Kona Charm Pack last night and immediately added it to my cart, and then thought about it and realized it was only the new colors, not all the colors I need – back to the cutting table.
See the previews below. I will start working on the samples and get the quilt top previews posted as soon as possible. You can find the Kona Color Cards Pattern here, and the Color Burst Pattern here. Thanks for visiting – I hope you are having a wonderful weekend and getting into the Thanksgiving spirit. Happy Fall Y’all!
Happy Monday + Happy Labor Day! I hope you are all having a good Labor Day holiday – and those of you on the East Coast stay safe!
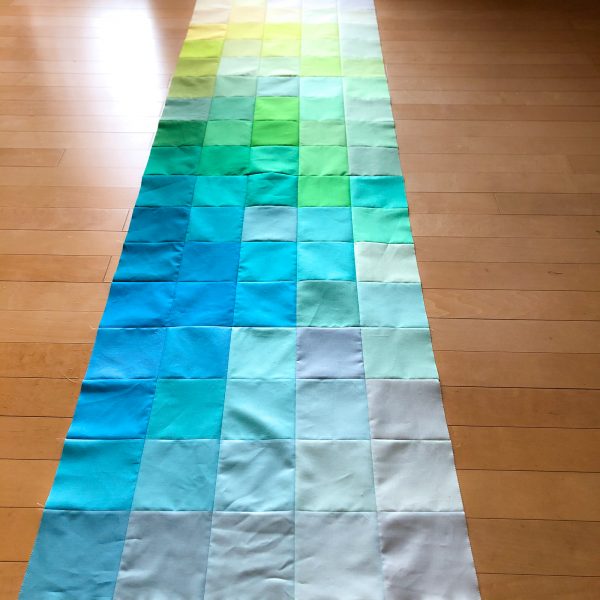
Remember this quilt top I posted back in 2015 that I made for a class I was going to teach?
I had it quilted and finished it last summer. The final version looks like this:
Then I made another version with different ombré fabrics and the finished top was completely different. This is the Version 2 quilt top I shared on Instagram in February:
I finally figured out how to write the pattern, and I finished it and posted it on Etsy.
PLUS I have a Labor Day sale through today. A great time to grab a new pattern and a gift for yourself – or some early Christmas Shopping!
Have a great day everyone – I am off to see my quilts at the State Fair!